Peanut Butter Cup Dump Cake Recipe
Introduction
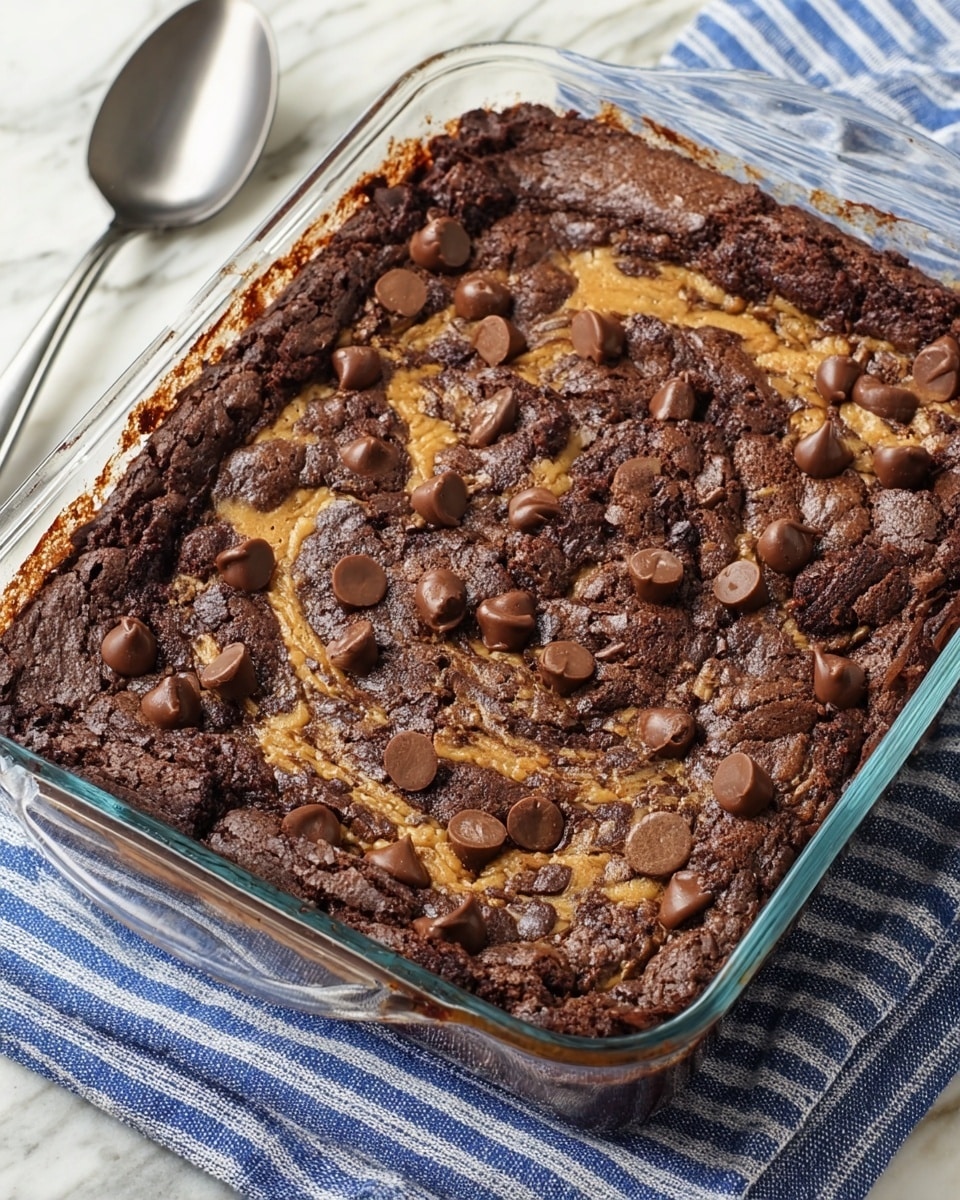
Peanut Butter Cup Dump Cake is an easy, decadent dessert that combines rich chocolate and peanut butter flavors in one simple bake. Perfect for a quick treat, it comes together with minimal effort but delivers maximum indulgence.
Ingredients
- 1 box (15.25 oz) chocolate cake mix
- 1 box (3.4 oz) instant chocolate pudding mix
- 1¾ cups milk
- 1 package (8 oz) mini peanut butter cups, roughly chopped
Instructions
- Step 1: Preheat your oven to 180°C (350°F). Spray a 13 x 9 inch baking dish with non-stick spray and set aside.
- Step 2: In a large bowl, whisk together the milk and instant pudding mix until well combined.
- Step 3: Add the chocolate cake mix and stir until everything is well blended. The mixture will be quite thick – this is perfect!
- Step 4: Roughly chop the peanut butter cups and fold them through the batter.
- Step 5: Pour the mixture into your prepared baking dish and spread evenly.
- Step 6: Bake for 25 minutes, or until a skewer inserted into the centre comes out clean with just a few moist crumbs.
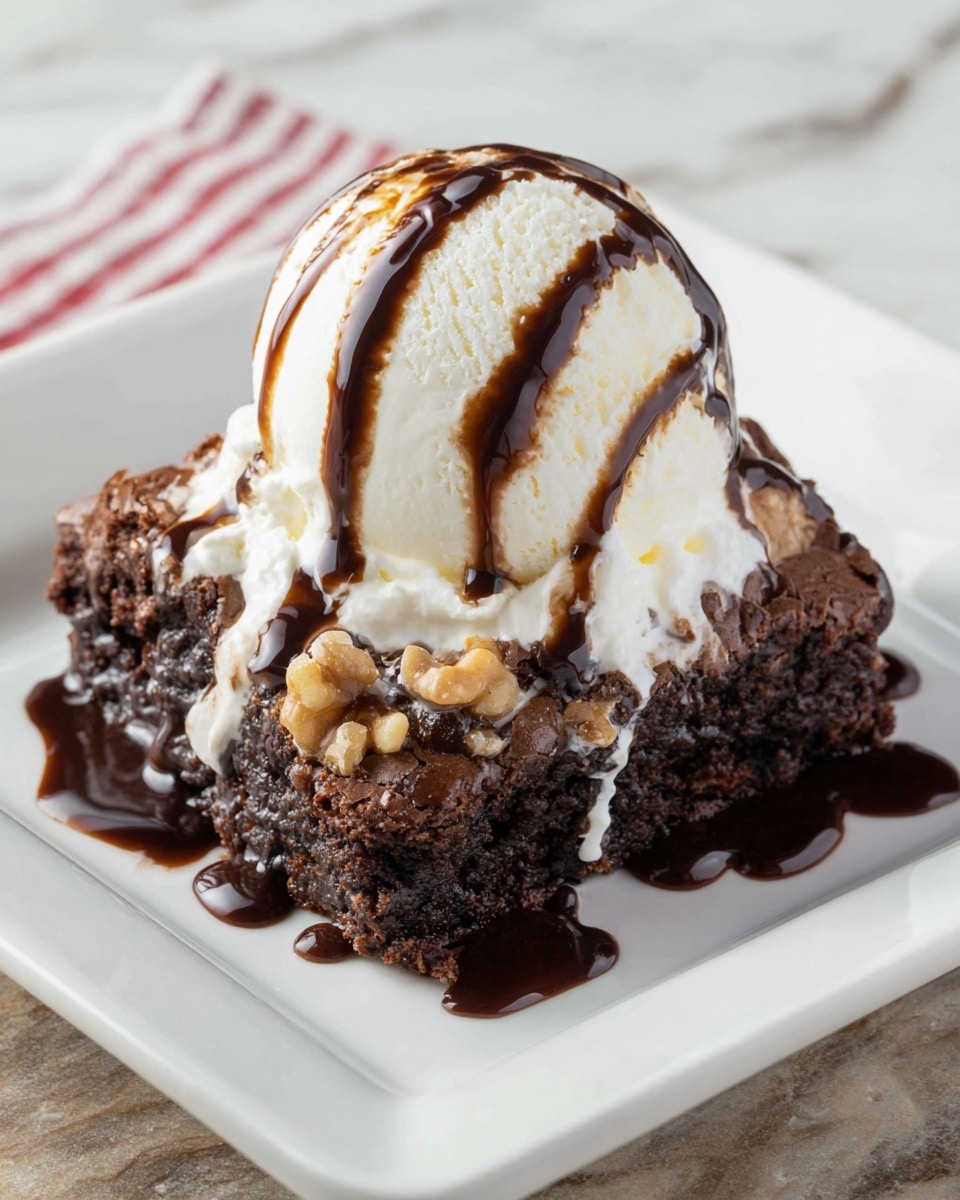
- Step 7: Let the cake cool slightly before serving. This is absolutely delicious served warm with vanilla ice cream!
Tips & Variations
- For an extra gooey texture, add a handful of chocolate chips or drizzle melted peanut butter over the top before baking.
- Try substituting regular peanut butter cups with dark chocolate or white chocolate varieties for a twist on the classic flavor.
- If you prefer a firmer cake, bake for an additional 5 minutes, but be careful not to dry it out.
Storage
Store leftover cake covered at room temperature for up to 2 days or refrigerated for up to 5 days. Reheat gently in the microwave to enjoy warm again, especially delicious with a scoop of ice cream.
How to Serve
Serve this delicious recipe with your favorite sides.
FAQs
Can I use regular peanut butter cups instead of mini ones?
Yes, just chop regular-sized peanut butter cups into smaller pieces before folding them into the batter.
Do I need to add oil or eggs to this cake mix?
No, the pudding mix and milk add moisture and richness, so additional oil or eggs aren’t necessary for this recipe.
PrintPeanut Butter Cup Dump Cake Recipe

Peanut Butter Cup Dump Cake is a delicious and easy-to-make dessert combining rich chocolate cake mix, creamy instant pudding, and chunks of peanut butter cups. This decadent treat is baked to perfection, creating a moist cake with delightful pockets of peanut butter goodness, making it perfect for satisfying chocolate and peanut butter cravings.
- Prep Time: 10 minutes
- Cook Time: 25 minutes
- Total Time: 35 minutes
- Yield: 12 servings 1x
- Category: Dessert
- Method: Baking
- Cuisine: American
Ingredients
Dry Ingredients
- 1 box (15.25 oz) chocolate cake mix
- 1 box (3.4 oz) instant chocolate pudding mix
Wet Ingredients
- 1¾ cups milk
Add-ins
- 1 package (8 oz) mini peanut butter cups, roughly chopped
Instructions
- Preheat Oven: Preheat your oven to 180°C (350°F). Grease a 13 x 9 inch baking dish with non-stick spray to ensure the cake does not stick during baking and set it aside.
- Mix Pudding and Milk: In a large bowl, whisk together the milk and instant chocolate pudding mix until fully combined and smooth, creating a rich base for the cake batter.
- Add Cake Mix: Add the chocolate cake mix to the pudding mixture and stir until the batter is thick and evenly blended. Do not worry about thickness; this consistency is ideal for the dump cake.
- Fold in Peanut Butter Cups: Roughly chop the mini peanut butter cups and gently fold them into the batter, ensuring they are evenly distributed throughout for pockets of peanut butter flavor.
- Pour Batter into Dish: Transfer the batter to the prepared baking dish and spread it out evenly with a spatula for uniform baking.
- Bake: Bake in the preheated oven for 25 minutes, or until a skewer inserted into the center comes out clean or with just a few moist crumbs, indicating the cake is done.
- Cool and Serve: Allow the cake to cool slightly before serving. For an extra treat, serve warm with a scoop of vanilla ice cream for contrast in temperature and texture.
Notes
- You can substitute milk with any plant-based milk if you prefer a dairy-free option.
- For an extra gooey texture, you can gently press some additional peanut butter cups on top before baking.
- Use a toothpick or skewer to check doneness; avoid overbaking to keep the cake moist.
- Store leftovers covered in the refrigerator for up to 3 days; reheat in the microwave before serving.
- This cake is best enjoyed warm but can also be served at room temperature.
Keywords: peanut butter cup cake, chocolate dump cake, easy dessert, quick cake recipe, peanut butter chocolate dessert