Rice Krispy Treat No-Bake Cheesecake Recipe
Introduction
This Rice Krispy Treat No-Bake Cheesecake combines a nostalgic cereal crust with a light, fluffy cheesecake filling. It’s a fun and easy dessert perfect for any occasion that requires no oven time.
Ingredients
- 6 cups Rice Krispies cereal
- ¼ cup salted butter
- 1 (10 oz) bag miniature marshmallows
- 1 (8 oz) block cream cheese, softened
- ½ cup granulated sugar
- 1 tsp pure vanilla extract
- 1 (7 oz) jar marshmallow crème (e.g., Fluff)
- 1 (8 oz) tub Cool Whip, thawed
- Whipped cream (homemade or canned, optional for garnish)
- Cubed store-bought or homemade Rice Krispy Treats (optional for garnish)
Instructions
- Step 1: Generously grease a 9- or 10-inch springform pan with nonstick spray and set it aside.
- Step 2: In a large bowl, place the Rice Krispies cereal. In a medium saucepan over low heat, melt the butter and miniature marshmallows together, stirring constantly until smooth and fully combined. Pour this mixture over the cereal and stir until the cereal is evenly coated.
- Step 3: Transfer the sticky cereal mixture into the prepared springform pan. Using a greased glass or spatula, firmly press it into the bottom and slightly up the sides to form a sturdy crust. Let it set at room temperature for 15–20 minutes.
- Step 4: In a stand mixer or large bowl, beat the softened cream cheese, sugar, and vanilla extract until smooth and creamy, about 1 minute. Add the marshmallow crème and mix until fully incorporated.
- Step 5: Gently fold in the thawed Cool Whip by hand with a spatula to keep the filling light and airy.
- Step 6: Pour the filling into the set crust and smooth the top with an offset spatula or the back of a spoon.
- Step 7: Refrigerate the assembled cheesecake for at least 2 hours, or until the filling is firm enough to hold its shape when sliced.
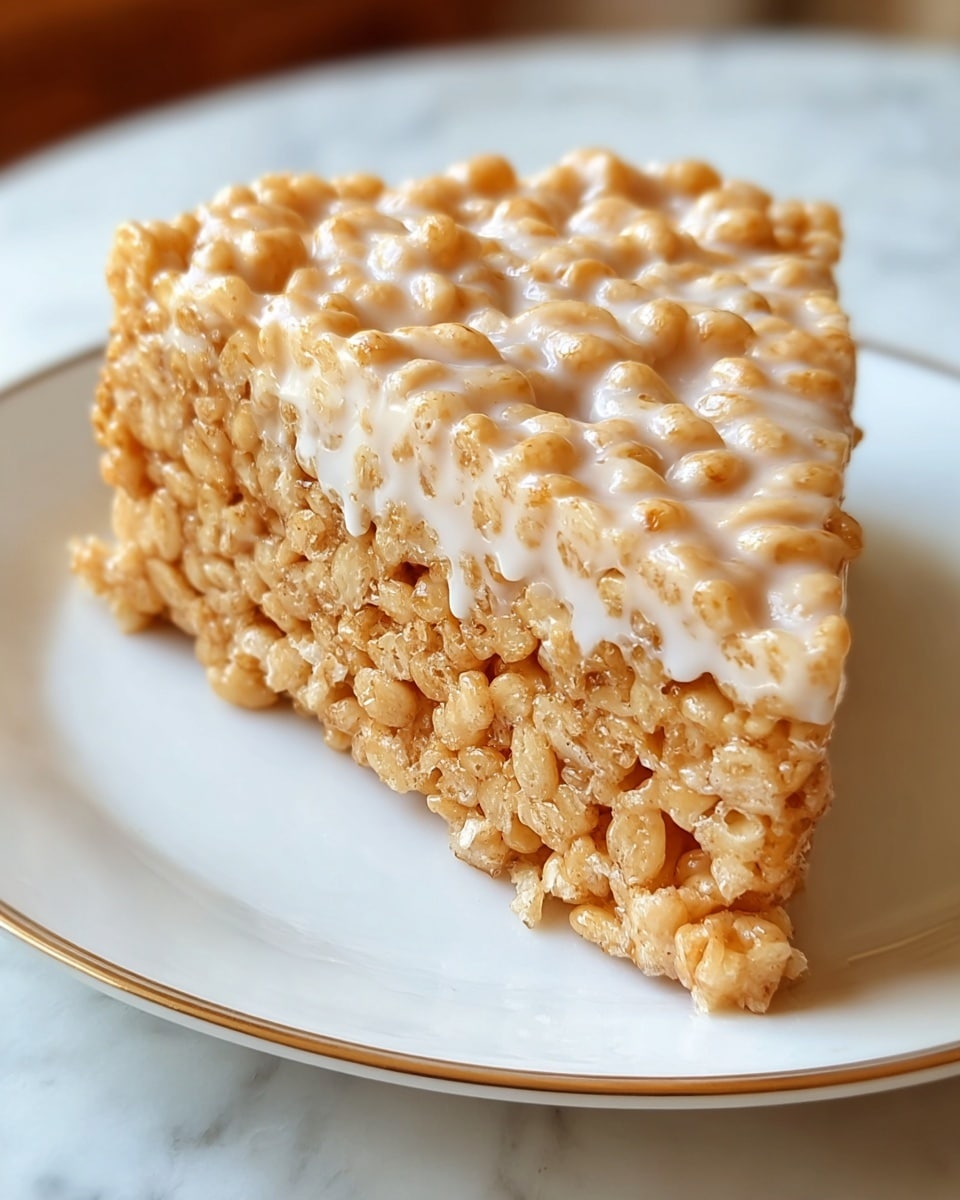
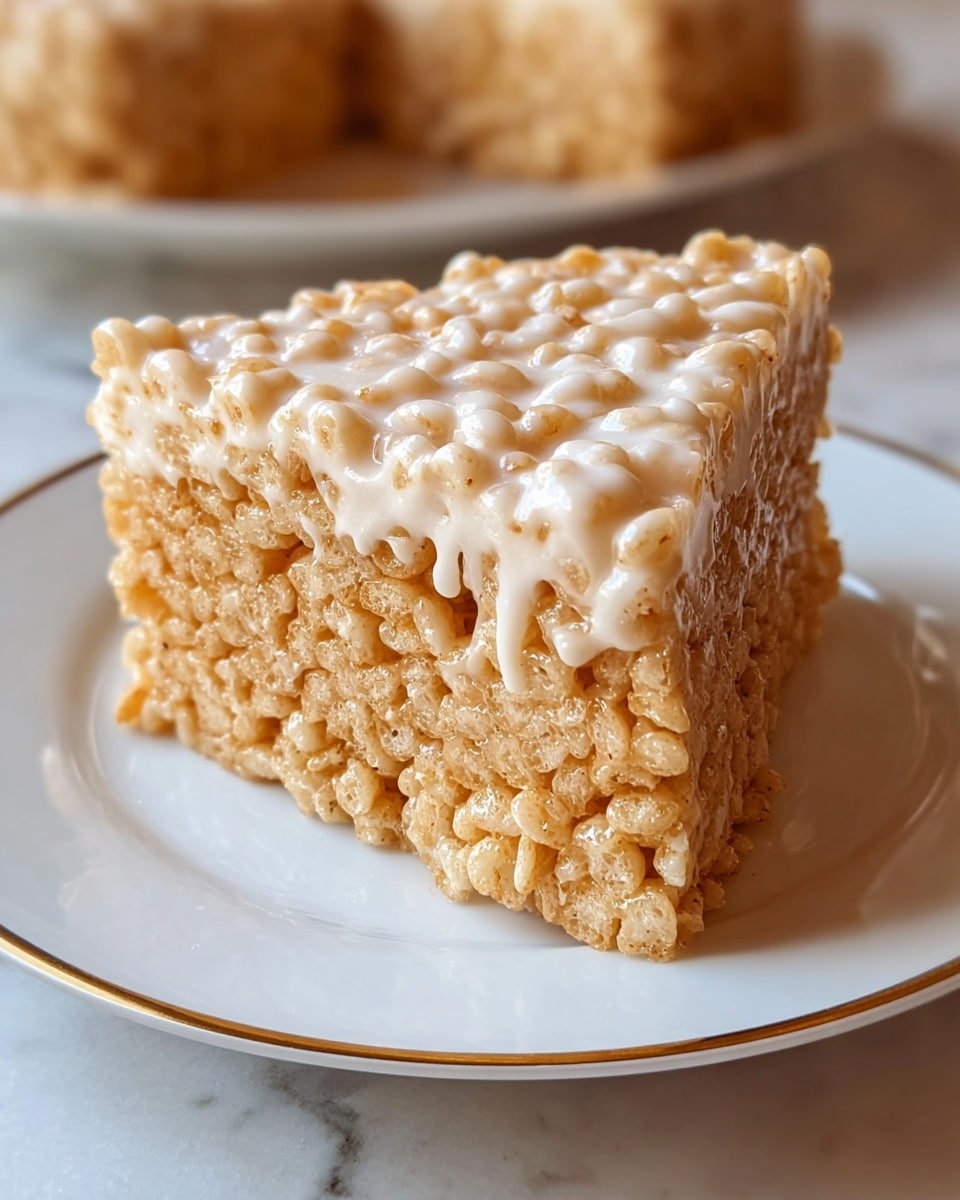
- Step 8: Before serving, garnish by piping or dolloping whipped cream around the edges and topping with cubed Rice Krispy Treats if desired. Carefully release the springform pan collar and slice with a warm knife for clean cuts.
Tips & Variations
- For an extra crunch, toast the Rice Krispies lightly before mixing with the marshmallow butter mixture.
- Substitute Cool Whip with homemade whipped cream for a fresher taste.
- Add a few drops of food coloring to the filling for a fun, festive twist.
- Use mini chocolate chips or sprinkles to decorate the top along with the whipped cream for added texture and color.
Storage
Store the cheesecake covered in the refrigerator for up to 3 days. Keep it in the springform pan or transfer it to an airtight container. Reheat is not recommended since this is a no-bake chilled dessert; simply serve it cold for the best texture.
How to Serve
Serve this delicious recipe with your favorite sides.
FAQs
Can I use a regular pan instead of a springform pan?
Yes, you can use a regular pan lined with parchment paper for easier removal. Just lift the cheesecake out carefully after chilling, but a springform pan is best for clean slicing and presentation.
Is it necessary to chill the cheesecake for 2 hours?
Chilling is important for the filling to firm up and hold its shape when sliced. While you can serve it sooner, the texture will be softer and less stable.
PrintRice Krispy Treat No-Bake Cheesecake Recipe
This Rice Krispy Treat No-Bake Cheesecake is a delightful twist on a classic dessert, combining the crunchy, marshmallow-coated Rice Krispies crust with a creamy, fluffy no-bake cheesecake filling. Perfect for those looking for an easy-to-make, refrigerator-set dessert without the need for baking. Garnished with whipped cream and cubed Rice Krispy Treats, it offers a playful, delicious treat that’s ideal for parties and family gatherings.
- Prep Time: 20 minutes
- Cook Time: 10 minutes
- Total Time: 2 hours 30 minutes
- Yield: 8 to 10 servings 1x
- Category: Dessert
- Method: No-Cook
- Cuisine: American
Ingredients
For the Crust:
- 6 cups Rice Krispies cereal
- ¼ cup salted butter
- 1 (10 oz) bag miniature marshmallows
For the Filling:
- 1 (8 oz) block cream cheese, softened
- ½ cup granulated sugar
- 1 tsp pure vanilla extract
- 1 (7 oz) jar marshmallow crème (e.g., Fluff)
- 1 (8 oz) tub Cool Whip, thawed
For Garnish (optional):
- Whipped cream (homemade or canned)
- Cubed store-bought or homemade Rice Krispy Treats
Instructions
- Prep the Pan: Generously grease a 9- or 10-inch springform pan with nonstick spray to ensure the crust and cheesecake can be easily removed later. Set it aside while preparing other components. This step takes about 5 minutes.
- Make the Crust: In a large bowl, place the Rice Krispies cereal. In a medium saucepan over low heat, gently melt the butter along with the miniature marshmallows, stirring constantly until the mixture is smooth and well combined. Immediately pour this warm marshmallow mixture over the cereal and stir thoroughly until all cereal pieces are evenly coated. This step will take around 10 minutes.
- Form the Crust: Transfer the sticky cereal mixture into the prepared springform pan. Using a greased glass or spatula, firmly press the mixture into the bottom and slightly up the sides of the pan to form a sturdy, even crust. Allow the crust to set at room temperature for 15 to 20 minutes until it firms up.
- Prepare the Filling: In a stand mixer or a large bowl, beat together the softened cream cheese, granulated sugar, and pure vanilla extract until the mixture is smooth and creamy, about 1 minute. Add the marshmallow crème and continue mixing until fully incorporated. Finally, gently fold in the thawed Cool Whip using a spatula to maintain its light, airy texture. This process should take 5 to 7 minutes.
- Assemble: Pour the completed filling over the set Rice Krispies crust. Use an offset spatula or the back of a spoon to smooth the surface evenly. This takes approximately 5 minutes.
- Chill: Refrigerate the assembled cheesecake for at least 2 hours, or until the filling is firm and holds its shape when sliced.
- Garnish & Serve: Before serving, optionally pipe or dollop whipped cream around the edges of the cheesecake and top with cubed Rice Krispy Treat pieces for a fun and decorative finish. Carefully release the springform pan collar and slice the cheesecake using a warm knife to achieve clean cuts. This final step takes about 5 to 10 minutes.
Notes
- Ensure the cream cheese is fully softened before mixing to avoid lumps in the filling.
- Using a warm knife to slice the cheesecake helps produce clean, neat slices.
- The marshmallow crème adds extra sweetness and fluffy texture; do not skip this ingredient for best results.
- The chilled cheesecake can be stored covered in the refrigerator for up to 3 days.
- You can substitute the Rice Krispies cereal with another puffed rice cereal, but flavor and texture may slightly vary.
Keywords: Rice Krispy Treats, No-Bake Cheesecake, Marshmallow, Easy Dessert, Springform Pan, Cool Whip, Cream Cheese, No Bake, Party Dessert