No-Bake Cheesecake Pops Recipe
Introduction
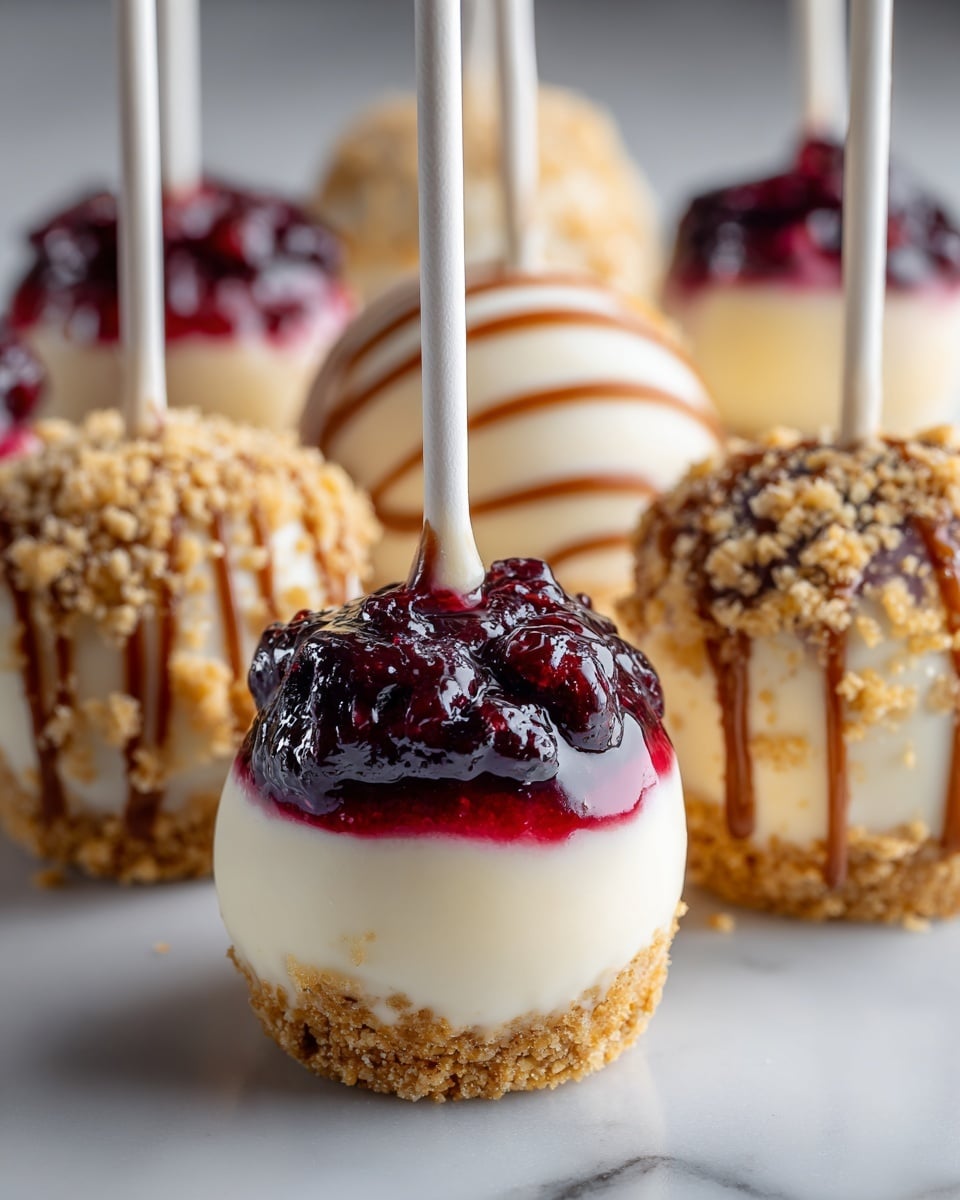
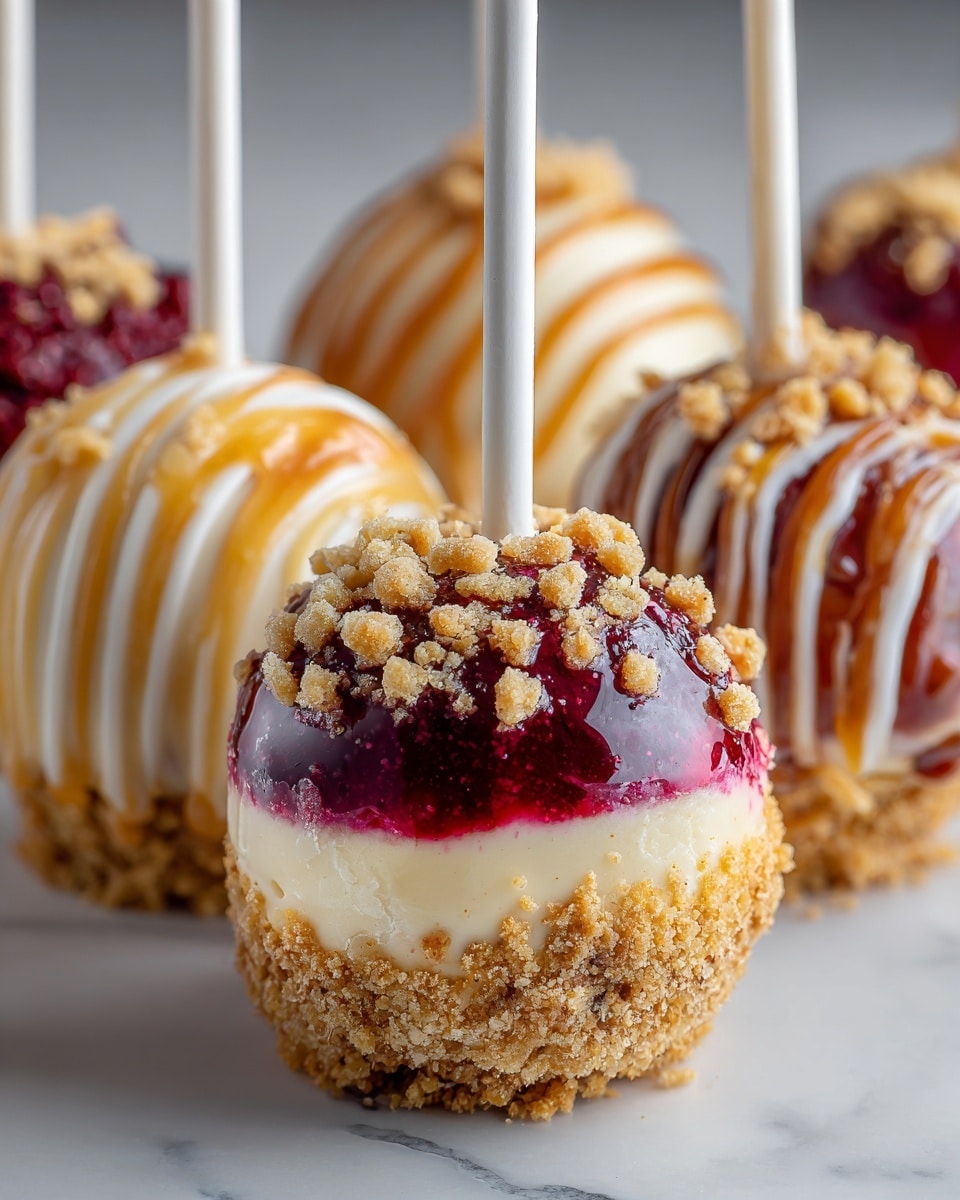
No-Bake Cheesecake Pops are a fun and delicious treat that’s perfect for parties or a special dessert. These creamy, bite-sized pops combine the smooth richness of cheesecake with a chocolate coating and your favorite toppings. They’re easy to make and require no oven time, making them a quick crowd-pleaser.
Ingredients
- 8 oz cream cheese, softened
- 1 cup powdered sugar
- 1 tsp vanilla extract
- 1/2 cup whipped cream
- 1 cup graham cracker crumbs
- 8 oz chocolate or candy melts (for coating)
- Popsicle sticks
- Sprinkles
- Crushed nuts (pecans, almonds, or hazelnuts)
- Mini chocolate chips
- Fresh fruit
Instructions
- Step 1: Beat the cream cheese until smooth. Gradually add powdered sugar and vanilla extract, mixing well. Gently fold in whipped cream to lighten the mixture and create a fluffy cheesecake texture.
- Step 2: Scoop the cheesecake mixture into small balls using a cookie scoop or your hands. Place the balls on a parchment-lined tray and freeze for about 30 minutes until firm.
- Step 3: Carefully insert popsicle sticks into each firm cheesecake ball to assist with dipping and create the classic pop appearance.
- Step 4: Melt chocolate or candy melts according to package instructions. Dip each cheesecake ball into the melted coating fully, allowing excess to drip off.
- Step 5: While the coating is still wet, sprinkle your chosen toppings such as crushed nuts, sprinkles, or mini chocolate chips. Place the pops back on the parchment-lined tray and chill until coating hardens.
Tips & Variations
- For extra flavor, gently mix in the graham cracker crumbs into the cheesecake mixture before shaping the pops.
- Try different coatings like white chocolate or peanut butter melts for variety.
- Add a small piece of fresh fruit inside each ball before freezing for a surprise burst of flavor.
- Use different toppings like shredded coconut or crushed candy canes depending on the season.
Storage
Store cheesecake pops in an airtight container in the refrigerator for up to 3 days. They can also be frozen for up to 2 weeks; just thaw in the fridge before serving. Reheat is not recommended, as the coating may melt and the texture can change.
How to Serve
Serve this delicious recipe with your favorite sides.
FAQs
Can I use regular cream instead of whipped cream?
Regular cream won’t provide the same fluffy texture as whipped cream. For best results, use whipped cream to lighten the cheesecake mixture.
How do I prevent the chocolate coating from cracking?
Make sure the cheesecake balls are well chilled or slightly frozen before dipping. Also, avoid thick layers of chocolate and allow the coating to set at room temperature or in the fridge gently.
PrintNo-Bake Cheesecake Pops Recipe

These No-Bake Cheesecake Pops are a delightful and easy-to-make dessert perfect for parties and special occasions. Creamy cheesecake mixture is shaped into bite-sized pops, frozen to firmness, then dipped in a smooth chocolate coating and decorated with your favorite toppings like sprinkles, nuts, or mini chocolate chips. Ready in under an hour without any baking involved, these treats offer a fun twist on classic cheesecake with a playful pop presentation.
- Prep Time: 15 minutes
- Cook Time: 0 minutes
- Total Time: 45 minutes
- Yield: 12 cheesecake pops 1x
- Category: Dessert
- Method: No-Cook
- Cuisine: American
- Diet: Vegetarian
Ingredients
Cheesecake Mixture
- 8 oz cream cheese, softened
- 1 cup powdered sugar
- 1 tsp vanilla extract
- 1/2 cup whipped cream
Crust Coating and Decorations
- 1 cup graham cracker crumbs
- 8 oz chocolate or candy melts (for coating)
- Popsicle sticks
- Sprinkles
- Crushed nuts (pecans, almonds, or hazelnuts)
- Mini chocolate chips
- Fresh fruit (optional, for garnish)
Instructions
- Prepare the Cheesecake Mixture: Beat the softened cream cheese until smooth and creamy. Gradually add the powdered sugar along with vanilla extract, mixing thoroughly. Gently fold in the whipped cream to lighten the mixture, creating a fluffy and smooth cheesecake texture.
- Shape the Pops: Using a cookie scoop or your hands, form the cheesecake mixture into small balls. Place these balls on a parchment-lined tray, ensuring they are evenly spaced to avoid sticking. Freeze for about 30 minutes until the balls become firm and hold their shape.
- Insert the Sticks: Carefully insert popsicle sticks into each firm cheesecake ball. This step makes dipping easier and provides the classic look of cheesecake pops.
- Coat the Pops: Melt the chocolate or candy melts according to the package instructions, making sure it’s smooth and fluid. Fully dip each cheesecake ball in the melted coating, allowing any excess chocolate to drip off back into the bowl to avoid thick clumps.
- Add Toppings and Set: While the coating is still wet, sprinkle your choice of toppings—such as crushed nuts, colorful sprinkles, or mini chocolate chips—over the pops to add texture and flavor. Place the coated pops back onto the parchment-lined tray and refrigerate until the chocolate coating hardens completely.
Notes
- Ensure the cream cheese is softened to room temperature for easier mixing and a smoother texture.
- Freezing the cheesecake balls before dipping prevents them from falling apart and ensures a better coating.
- You can customize toppings with fresh fruit pieces or different nuts based on your preferences.
- If candy melts are not available, tempered chocolate works well for coating.
- Store pops in the refrigerator and consume within 3-4 days for best freshness.
Keywords: no-bake cheesecake pops, cheesecake pops recipe, easy no-bake dessert, chocolate coated cheesecake, party dessert pops