Brownie Refrigerator Cake Recipe
Introduction
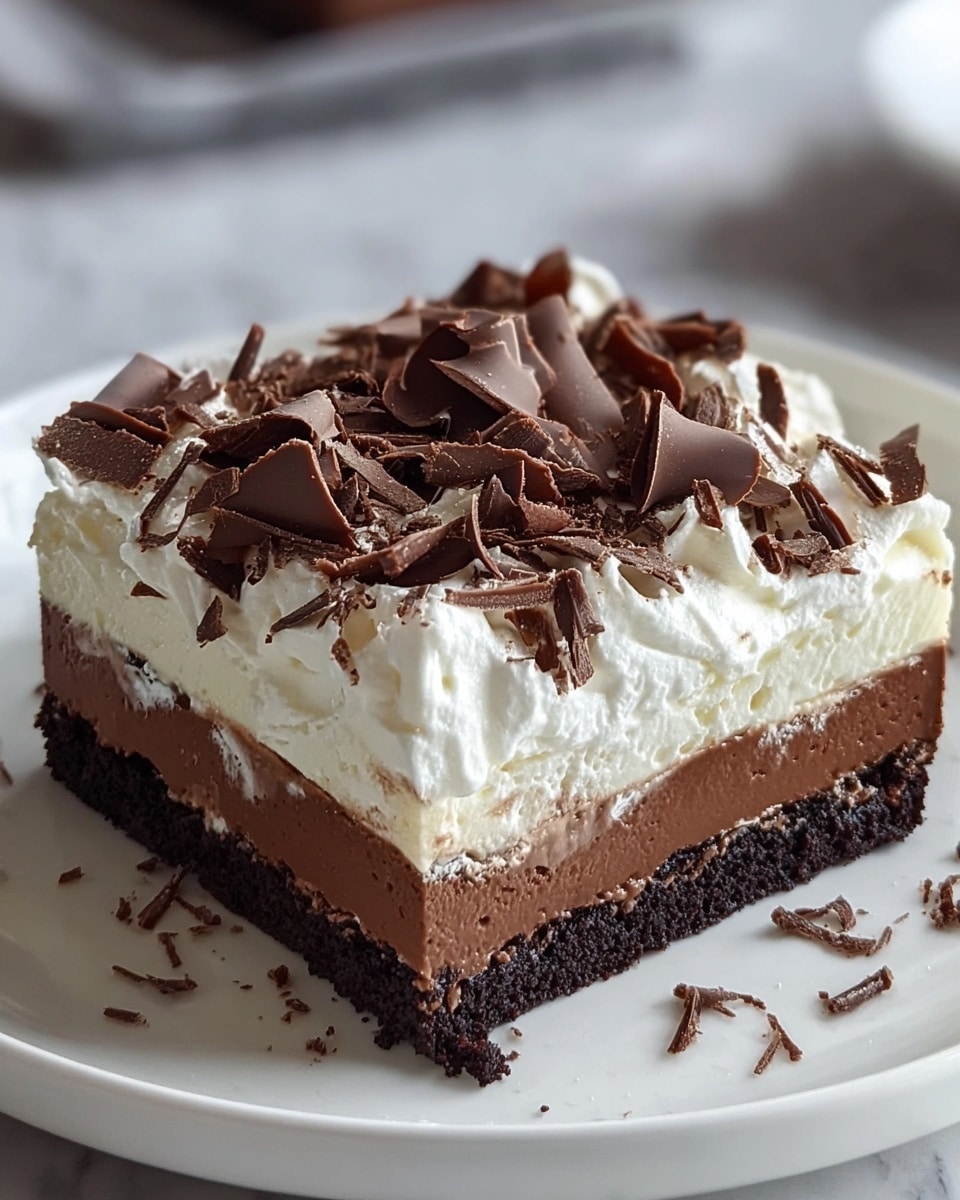
Brownie Refrigerator Cake is a no-bake layered dessert that combines rich brownies, creamy cheesecake, and smooth pudding for a deliciously decadent treat. It’s perfect for gatherings or any time you want a cool, indulgent dessert without turning on the oven for too long.

Ingredients
- 1 box brownie mix (prepared according to package instructions)
- 1 extra-large egg (or as required by brownie mix)
- 1 (8 oz.) package cream cheese, softened
- 1 cup powdered sugar
- 2 (8 oz.) containers whipped topping, divided
- 1 (3 oz.) package instant chocolate pudding
- 1 (3 oz.) package instant vanilla pudding
- 3 ½ cups milk
- 1 Hershey bar (grated) or chocolate syrup for drizzling
Instructions
- Step 1: Preheat the oven and prepare the brownie mix following the package instructions, using the extra-large egg. Bake in a 9×13-inch pan and let it cool completely.
- Step 2: In a bowl, beat the softened cream cheese with powdered sugar until smooth. Gently fold in one container of whipped topping until well combined. Spread this mixture evenly over the cooled brownies.
- Step 3: Whisk together the chocolate pudding mix, vanilla pudding mix, and milk until the mixture thickens. Let it sit for 5 minutes to set, then spread it over the cream cheese layer.
- Step 4: Spread the second container of whipped topping over the pudding layer. Garnish with grated Hershey’s chocolate or drizzle with chocolate syrup.
- Step 5: Cover the dish and refrigerate for at least 4 hours, preferably overnight, before slicing and serving chilled.
Tips & Variations
- For a nutty crunch, sprinkle chopped walnuts or pecans over the pudding layer before adding the whipped topping.
- Use homemade brownies for a more personalized flavor.
- Substitute flavored puddings like mocha or caramel to change up the taste.
- If you prefer a lighter dessert, use low-fat cream cheese and reduced-fat whipped topping.
Storage
Store the brownie refrigerator cake covered in the refrigerator for up to 3 days. For best texture and flavor, consume within this timeframe. When ready to serve again, slice and enjoy chilled. Avoid freezing as the texture of the pudding and whipped topping may be affected.
How to Serve
Serve this delicious recipe with your favorite sides.
FAQs
Can I make this dessert in advance?
Yes, this dish benefits from being made a few hours or even overnight in advance to allow the layers to set and the flavors to meld.
Can I use other types of pudding for this recipe?
Absolutely! You can experiment with different pudding flavors such as butterscotch, caramel, or even banana to customize the dessert to your liking.
PrintBrownie Refrigerator Cake Recipe

This Brownie Refrigerator Cake is a luscious no-bake dessert combining a rich brownie base with creamy layers of sweetened cream cheese, a pudding blend, and fluffy whipped topping, finished with a chocolate garnish. Perfect for a make-ahead treat, it’s chilled to set and served cold, making it an indulgent and refreshing dessert for any occasion.
- Prep Time: 25 minutes
- Cook Time: 35 minutes
- Total Time: 4 hours 60 minutes (including chilling)
- Yield: 12 servings 1x
- Category: Dessert
- Method: Baking
- Cuisine: American
Ingredients
Brownie Layer
- 1 box brownie mix (prepared according to package instructions)
- 1 extra-large egg (or as required by brownie mix)
Cream Cheese Layer
- 1 (8 oz.) package cream cheese, softened
- 1 cup powdered sugar
- 1 (8 oz.) container whipped topping
Pudding Layer
- 1 (3 oz.) package instant chocolate pudding
- 1 (3 oz.) package instant vanilla pudding
- 3 ½ cups milk
- 1 (8 oz.) container whipped topping
Topping
- 1 Hershey bar (grated) or chocolate syrup for drizzling
Instructions
- Prepare the Brownie Base: Preheat your oven as directed on the brownie mix package. Prepare the brownie mix using an extra-large egg as instructed, then bake in a 9×13-inch pan. Allow the brownie layer to cool completely before layering.
- Make the Cream Cheese Layer: In a mixing bowl, beat the softened cream cheese with powdered sugar until smooth and creamy. Gently fold in one 8 oz. container of whipped topping until well combined. Spread this mixture evenly over the cooled brownie base.
- Prepare the Pudding Layer: In another bowl, whisk together the instant chocolate and vanilla pudding mixes with 3 ½ cups of milk until the mixture thickens. Let it stand for 5 minutes to set properly. Then, spread this pudding layer evenly over the cream cheese layer.
- Final Layer & Garnish: Spread the remaining 8 oz. container of whipped topping over the pudding layer for a fluffy finish. Sprinkle grated Hershey’s chocolate on top or drizzle with chocolate syrup to garnish.
- Chill & Serve: Cover the assembled cake and refrigerate for at least 4 hours, preferably overnight, to let the layers set and flavors meld. Slice into squares and serve chilled for a delightful dessert experience.
Notes
- You can substitute whipped topping with freshly whipped cream for a fresher taste.
- For a gluten-free option, use a gluten-free brownie mix.
- Make sure the brownies are completely cooled before adding the cream cheese layer to prevent melting.
- This dessert is best served chilled and can be stored covered in the refrigerator for up to 3 days.
- Feel free to add nuts or chocolate chips to the brownie batter for extra texture.
Keywords: brownie refrigerator cake, no-bake dessert, layered dessert, chocolate pudding cake, cream cheese dessert