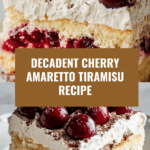
Cherry Amaretto Tiramisu Recipe
Introduction
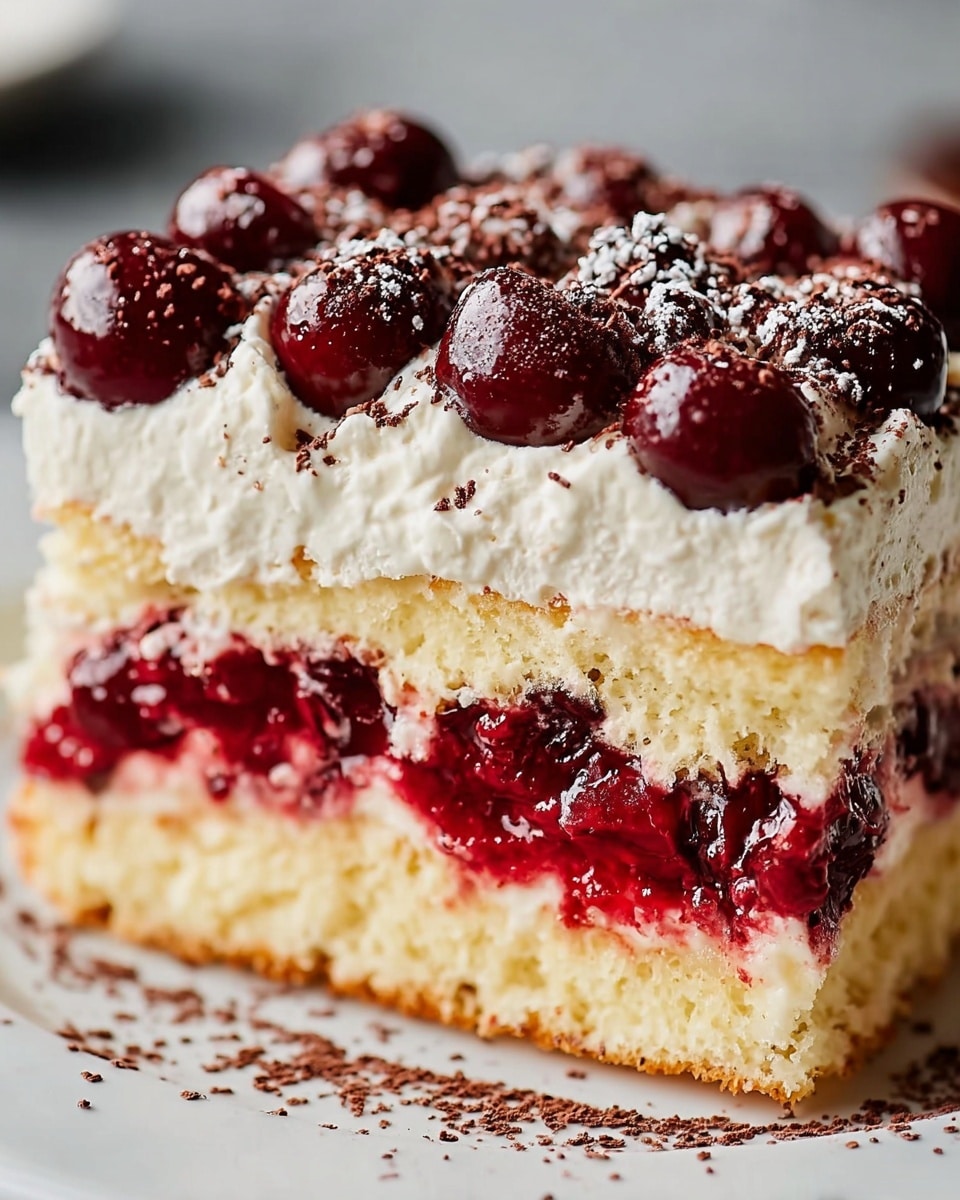
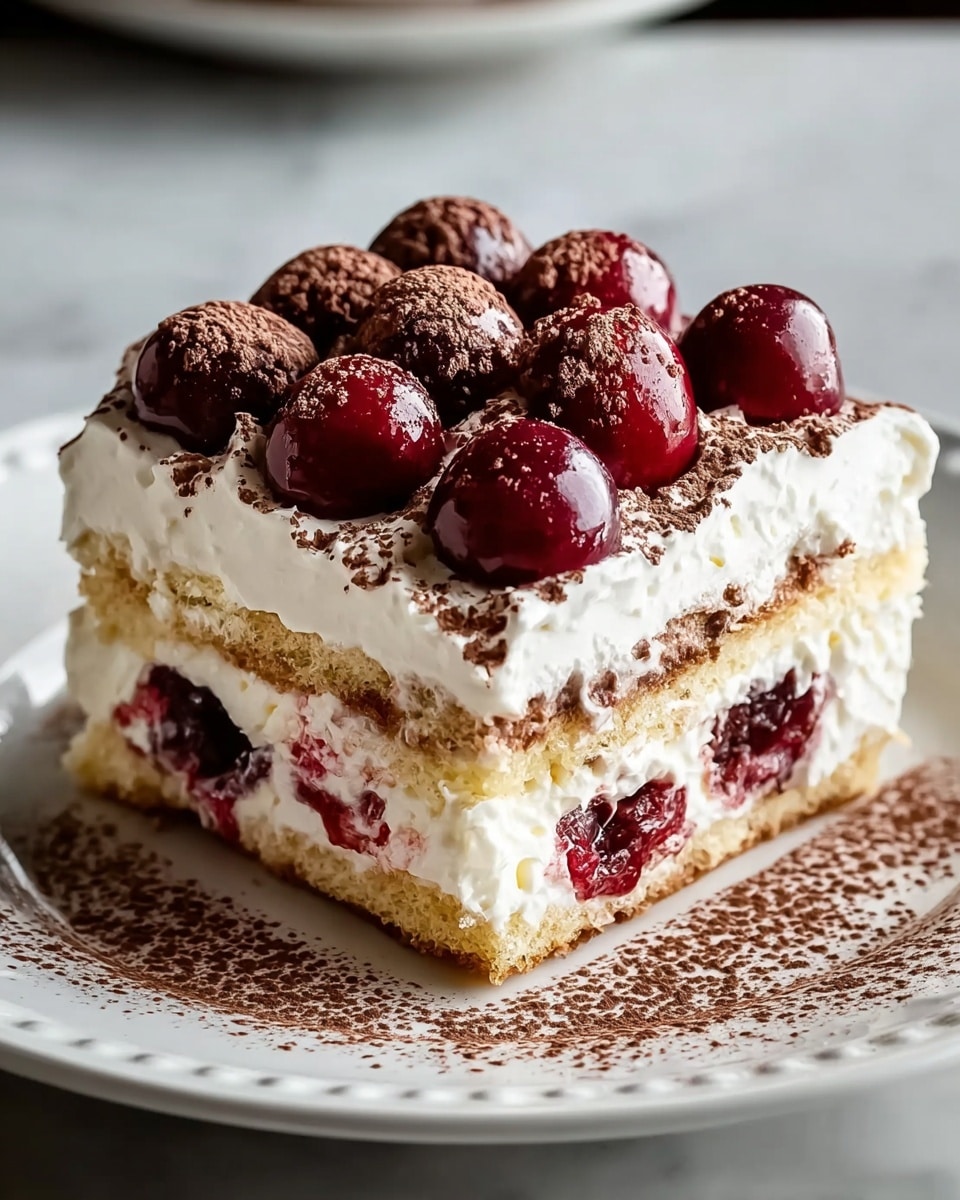
This Cherry Amaretto Tiramisu combines the classic creamy delight with a fresh cherry twist and a hint of almond liqueur. It’s a luscious, elegant dessert perfect for impressing guests or treating yourself to something special.
Ingredients
- 2 cups fresh cherries, pitted and halved
- 3 tbsp granulated sugar
- ¼ cup Amaretto liqueur
- 1 tbsp lemon juice
- 1 cup heavy cream, cold
- 1 cup mascarpone cheese, room temperature
- ⅓ cup powdered sugar
- 1 tsp vanilla extract
- ¾ cup brewed espresso or strong coffee, cooled
- 2 tbsp Amaretto liqueur
- 1 pack (approx. 24) ladyfinger biscuits (gluten-free if preferred)
- Unsweetened cocoa powder (for dusting)
- Fresh cherries and shaved dark chocolate (optional, for garnish)
Instructions
- Step 1: In a saucepan, combine the cherries, sugar, lemon juice, and Amaretto. Cook over medium heat for 5–7 minutes, stirring occasionally, until the cherries are soft and slightly syrupy. Remove from heat and let cool completely.
- Step 2: In a large bowl, beat the cold heavy cream until soft peaks form. In another bowl, whisk together mascarpone, powdered sugar, and vanilla extract until smooth. Gently fold the whipped cream into the mascarpone mixture until fully combined and fluffy.
- Step 3: Stir the Amaretto into the cooled espresso or coffee. Pour the mixture into a shallow dish suitable for dipping.
- Step 4: Briefly dip each ladyfinger into the espresso-Amaretto mixture for 1–2 seconds per side. Arrange a single layer of dipped ladyfingers in the bottom of an 8×8-inch dish or individual trifle glasses.
- Step 5: Spoon half of the mascarpone cream evenly over the ladyfingers. Then spread half of the cherry mixture on top of the cream.
- Step 6: Repeat the layering with the remaining dipped ladyfingers, mascarpone cream, and cherry mixture.
- Step 7: Cover the assembled tiramisu and refrigerate for at least 4 hours, or preferably overnight, to allow the flavors to meld and the dessert to firm up.
- Step 8: Before serving, dust the top with unsweetened cocoa powder and garnish with fresh cherries and shaved dark chocolate if desired.
Tips & Variations
- Use frozen cherries if fresh are unavailable—thaw and drain before cooking.
- For a non-alcoholic version, substitute Amaretto with almond extract and skip the soaking step.
- Gluten-free ladyfingers make this dessert suitable for gluten-sensitive guests.
- Adjust sweetness by varying the powdered sugar in the cream or sugar in the cherry mixture to your taste.
Storage
Store the tiramisu covered in the refrigerator for up to 3 days. It’s best enjoyed chilled. If you want to serve it again, let it sit at room temperature for about 10 minutes before serving to soften slightly. Avoid freezing, as the texture may change.
How to Serve
Serve this delicious recipe with your favorite sides.
FAQs
Can I make this tiramisu ahead of time?
Yes, it actually tastes better if made a day in advance. Allow at least 4 hours, but overnight refrigeration helps the flavors develop fully.
What can I use instead of Amaretto?
If you prefer a non-alcoholic option, almond extract works well in both the cherry and espresso layers. Use about 1/2 teaspoon instead of the liqueur to keep the almond flavor without alcohol.
PrintCherry Amaretto Tiramisu Recipe

A luxurious twist on classic tiramisu featuring layers of luscious mascarpone cream, vibrant cherry-amaretto compote, and delicate ladyfinger biscuits soaked in espresso and Amaretto liqueur. This Cherry Amaretto Tiramisu is an elegant, no-bake dessert perfect for special occasions or a delightful treat any time.
- Prep Time: 20 minutes
- Cook Time: 7 minutes
- Total Time: 4 hours 27 minutes (including chilling)
- Yield: 8 servings 1x
- Category: Dessert
- Method: No-Cook
- Cuisine: Italian
- Diet: Gluten Free
Ingredients
Cherry Layer
- 2 cups fresh cherries, pitted and halved
- 3 tbsp granulated sugar
- ¼ cup Amaretto liqueur
- 1 tbsp lemon juice
Cream Filling
- 1 cup heavy cream, cold
- 1 cup mascarpone cheese, room temperature
- ⅓ cup powdered sugar
- 1 tsp vanilla extract
Espresso Layer
- ¾ cup brewed espresso or strong coffee, cooled
- 2 tbsp Amaretto liqueur
- 1 pack (approx. 24) ladyfinger biscuits (gluten-free if preferred)
To Assemble & Garnish
- Unsweetened cocoa powder (for dusting)
- Fresh cherries (for garnish)
- Shaved dark chocolate (optional garnish)
Instructions
- Prepare the Cherry Mixture: In a saucepan, combine cherries, sugar, lemon juice, and Amaretto. Cook over medium heat for 5–7 minutes, stirring occasionally, until cherries are soft and slightly syrupy. Remove from heat and let cool completely to ensure layers set properly.
- Whip the Mascarpone Cream: In a large bowl, beat the cold heavy cream until soft peaks form. In a separate bowl, whisk together mascarpone, powdered sugar, and vanilla extract until smooth. Gently fold the whipped cream into the mascarpone mixture until fully combined and fluffy for a rich, creamy texture.
- Mix the Espresso Layer: Stir Amaretto into the cooled espresso or strong coffee. Pour this mixture into a shallow dish for easy dipping of ladyfingers, enhancing the flavor and moisture of the tiramisu.
- Assemble the Tiramisu: Briefly dip ladyfingers into the espresso-Amaretto mixture for 1–2 seconds per side to avoid sogginess. Arrange a single layer of dipped ladyfingers in the bottom of an 8×8″ dish or in individual trifle glasses. Spoon half the mascarpone cream over the ladyfingers, then evenly spread half of the cherry mixture on top. Repeat the layering with remaining dipped ladyfingers, mascarpone cream, and cherries for a beautifully layered dessert.
- Chill: Cover the assembled tiramisu and refrigerate for at least 4 hours, preferably overnight. This chilling time allows the flavors to meld and the dessert to firm up for optimal texture and taste.
- Garnish & Serve: Before serving, dust the top generously with unsweetened cocoa powder. Garnish with fresh cherries and shaved dark chocolate for an elegant and appetizing presentation.
Notes
- Use ripe, fresh cherries for the best flavor; frozen cherries can be used but thaw and drain excess liquid before cooking.
- Ladyfingers should be dipped briefly to prevent the dessert from becoming overly soggy.
- For a gluten-free version, opt for gluten-free ladyfinger biscuits.
- The tiramisu tastes best when refrigerated overnight to allow flavors to fully develop.
- Adjust the sweetness by varying the amount of sugar in the cherry mixture and powdered sugar in the cream filling.
Keywords: tiramisu, cherry tiramisu, amaretto tiramisu, Italian dessert, no-bake dessert, mascarpone dessert, coffee dessert, cherry dessert, gluten free dessert