Healthy Banana Brownies Recipe
Introduction
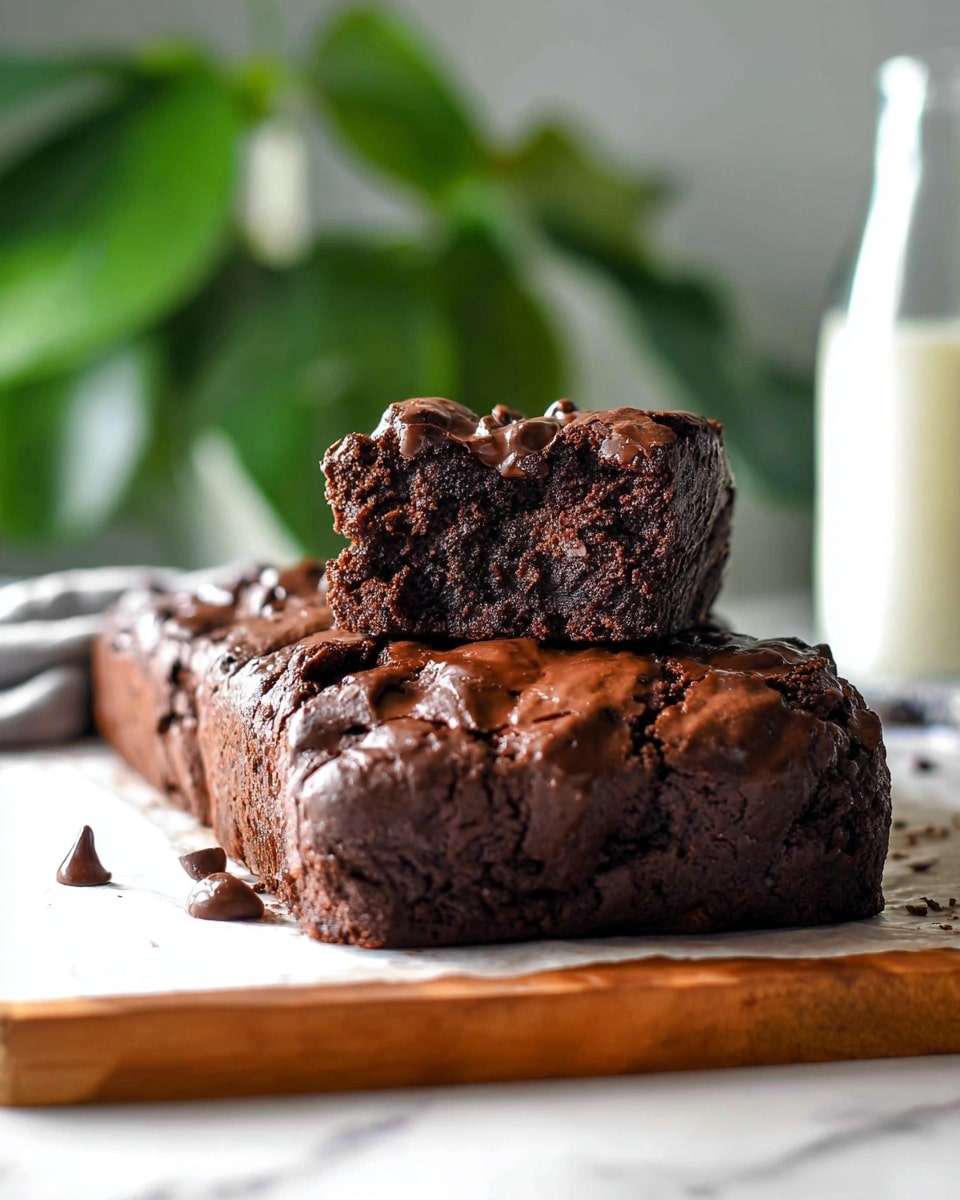
These healthy banana brownies offer a deliciously fudgy treat without the guilt. Made with ripe bananas, cocoa, and peanut butter, they’re naturally sweetened and perfect for a quick snack or dessert.
Ingredients
- 3 large ripe bananas
- 4 tablespoons unsweetened cocoa powder
- 1/2 cup unsalted peanut butter
- 1/2 cup dairy-free dark chocolate chips
Instructions
- Step 1: Preheat the oven to 350°F (180°C). Line a 6-inch brownie pan with parchment paper and grease it with cooking oil. Set aside.
- Step 2: In a large mixing bowl, mash the bananas into a smooth puree.
- Step 3: Stir in the peanut butter and cocoa powder with a silicone spatula until the mixture resembles brownie batter. It’s okay if you see bits of banana; just make sure the batter isn’t dry. If it is, add more mashed banana or a splash of almond milk.
- Step 4: Fold in the dairy-free dark chocolate chips.
- Step 5: Pour the batter into the prepared baking dish and optionally sprinkle extra chocolate chips on top.
- Step 6: Bake in the oven for 25–30 minutes, or until a toothpick inserted in the center comes out with a few moist crumbs.
- Step 7: Let the brownies cool on a rack for 20 minutes before slicing and serving.
Tips & Variations
- Use very ripe bananas for natural sweetness and moist brownies.
- Substitute peanut butter with almond or cashew butter for a different flavor.
- Add a pinch of cinnamon or a splash of vanilla extract to enhance the taste.
- For a nut-free version, try sunflower seed butter instead of peanut butter.
Storage
Store the brownies in an airtight container at room temperature for up to 2 days or in the refrigerator for up to a week. Reheat gently in the microwave for a few seconds to enjoy a warm, gooey texture.
How to Serve

Serve this delicious recipe with your favorite sides.
FAQs
Can I use regular chocolate chips instead of dairy-free?
Yes, you can use regular chocolate chips if you don’t require a dairy-free option. It will work just as well.
Are these brownies gluten-free?
Yes, this recipe is naturally gluten-free as it does not use any flour or gluten-containing ingredients.
PrintHealthy Banana Brownies Recipe
Deliciously fudgy and healthy banana brownies made with ripe bananas, unsweetened cocoa powder, peanut butter, and dairy-free dark chocolate chips. These brownies are dairy-free, naturally sweetened by bananas, and perfect for a guilt-free treat or snack.
- Prep Time: 10 minutes
- Cook Time: 30 minutes
- Total Time: 40 minutes
- Yield: 9 small brownies 1x
- Category: Dessert
- Method: Baking
- Cuisine: American
- Diet: Vegan
Ingredients
Banana Brownie Batter
- 3 large ripe bananas
- 4 tablespoons unsweetened cocoa powder
- 1/2 cup peanut butter (unsalted)
- 1/2 cup dairy-free dark chocolate chips
Instructions
- Preheat and Prepare Pan: Preheat the oven to 350°F (180°C). Line a 6-inch brownie pan with parchment paper and lightly grease it with cooking oil to prevent sticking. Set the pan aside.
- Mash Bananas: In a large mixing bowl, mash the ripe bananas thoroughly into a smooth puree, creating the base for your brownie batter.
- Combine Ingredients: Add the peanut butter and unsweetened cocoa powder to the mashed bananas. Stir the mixture gently with a silicone spatula until the batter resembles traditional brownie batter. It’s acceptable to have small banana chunks, but the batter should not be dry. If it is, add more mashed banana or a splash of almond milk to achieve the right consistency.
- Add Chocolate Chips: Fold in the dairy-free dark chocolate chips into the batter for melty pockets of chocolate in every bite.
- Pour Batter into Pan: Pour the brownie batter into the prepared pan, smoothing the surface evenly. Optionally, sprinkle extra chocolate chips on top for a decorative and tasty finish.
- Bake: Place the pan in the preheated oven and bake for 25-30 minutes. Check doneness by inserting a toothpick into the center; it should come out with a few moist crumbs but no wet batter.
- Cool and Serve: Remove the brownies from the oven and allow them to cool on a cooling rack for about 20 minutes before cutting and serving to ensure they set properly.
Notes
- Use ripe bananas for the best natural sweetness and moisture.
- Unsweetened cocoa powder keeps these brownies low in sugar while delivering rich chocolate flavor.
- Make sure to use smooth peanut butter for better batter consistency.
- If you wish, substitute almond butter or other nut butters as preferred.
- Allow brownies to cool fully before slicing to prevent them from crumbling.
- Store leftovers in an airtight container at room temperature for up to 3 days or refrigerate for up to 1 week.
Keywords: banana brownies, healthy brownies, vegan brownies, dairy-free dessert, peanut butter brownies, chocolate brownies, gluten free brownies