Pumpkin Patch Deviled Eggs Recipe
Introduction
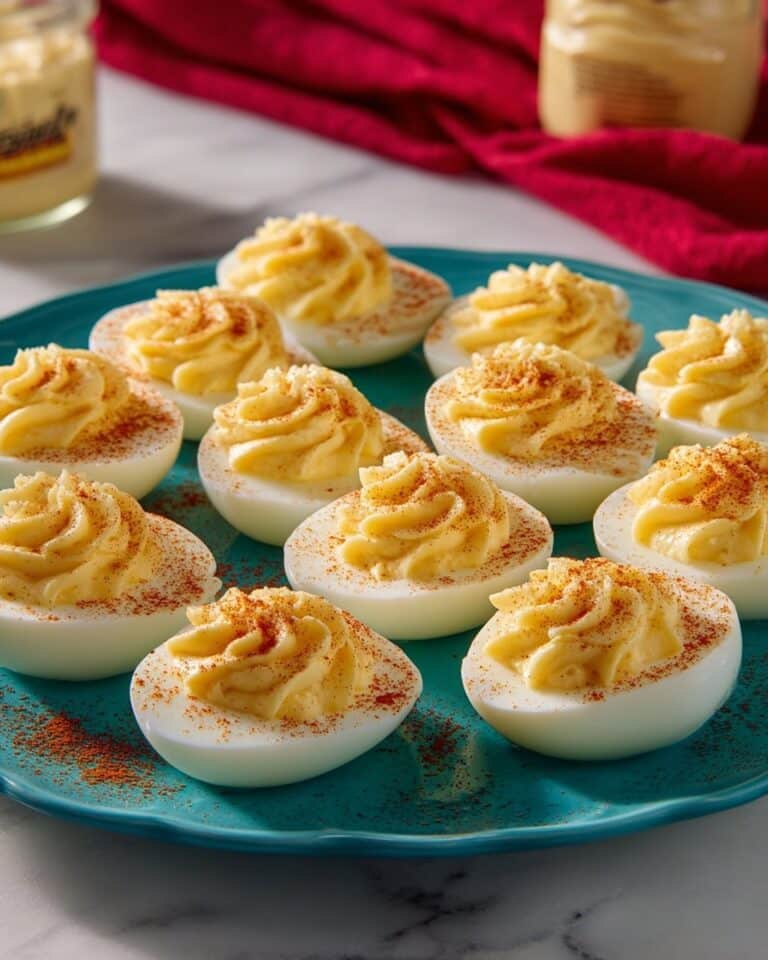
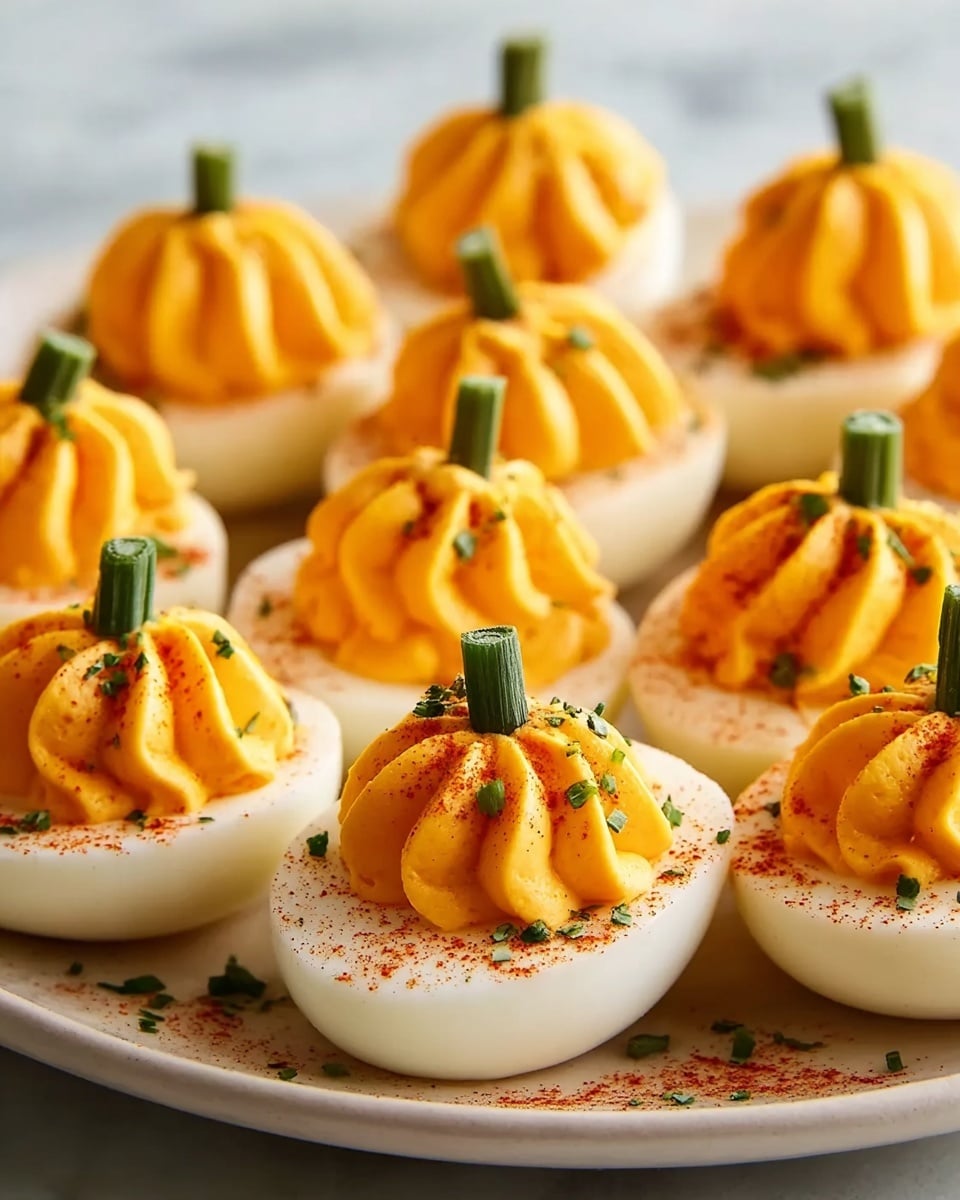
These Pumpkin Patch Deviled Eggs add a fun and festive twist to a classic appetizer. Creamy, flavorful, and beautifully decorated, they look like little pumpkins perfect for fall gatherings or Halloween parties.
Ingredients
- 6 large eggs
- 1/4 cup mayonnaise
- 1 teaspoon yellow mustard
- 1/4 teaspoon salt
- 1/8 teaspoon black pepper
- 1/2 teaspoon paprika, plus more for dusting
- A tiny dash of orange food coloring (optional, for vibrant pumpkin color)
- 2 tablespoons fresh chives, finely chopped (for stems and garnish)
Instructions
- Step 1: Place eggs in a single layer in a saucepan and cover with cold water about an inch above the eggs. Bring to a rolling boil over high heat. Once boiling, remove from heat, cover with a lid, and let sit for exactly 10 minutes.
- Step 2: Prepare an ice bath by filling a large bowl with ice and water. Transfer the eggs with a slotted spoon into the ice bath and let cool completely for at least 5 minutes.
- Step 3: Gently crack the cooled eggshells by tapping on a hard surface, then roll each egg between your hands to loosen the shell. Peel under cool running water for easier removal and smooth whites.
- Step 4: Slice each peeled egg in half lengthwise and carefully scoop out the yolks into a small bowl. Arrange the egg whites on a serving platter.
- Step 5: Add mayonnaise, mustard, salt, pepper, and 1/2 teaspoon paprika to the yolks. Add orange food coloring if using. Mash and mix until smooth and creamy; for extra smoothness, press through a fine sieve.
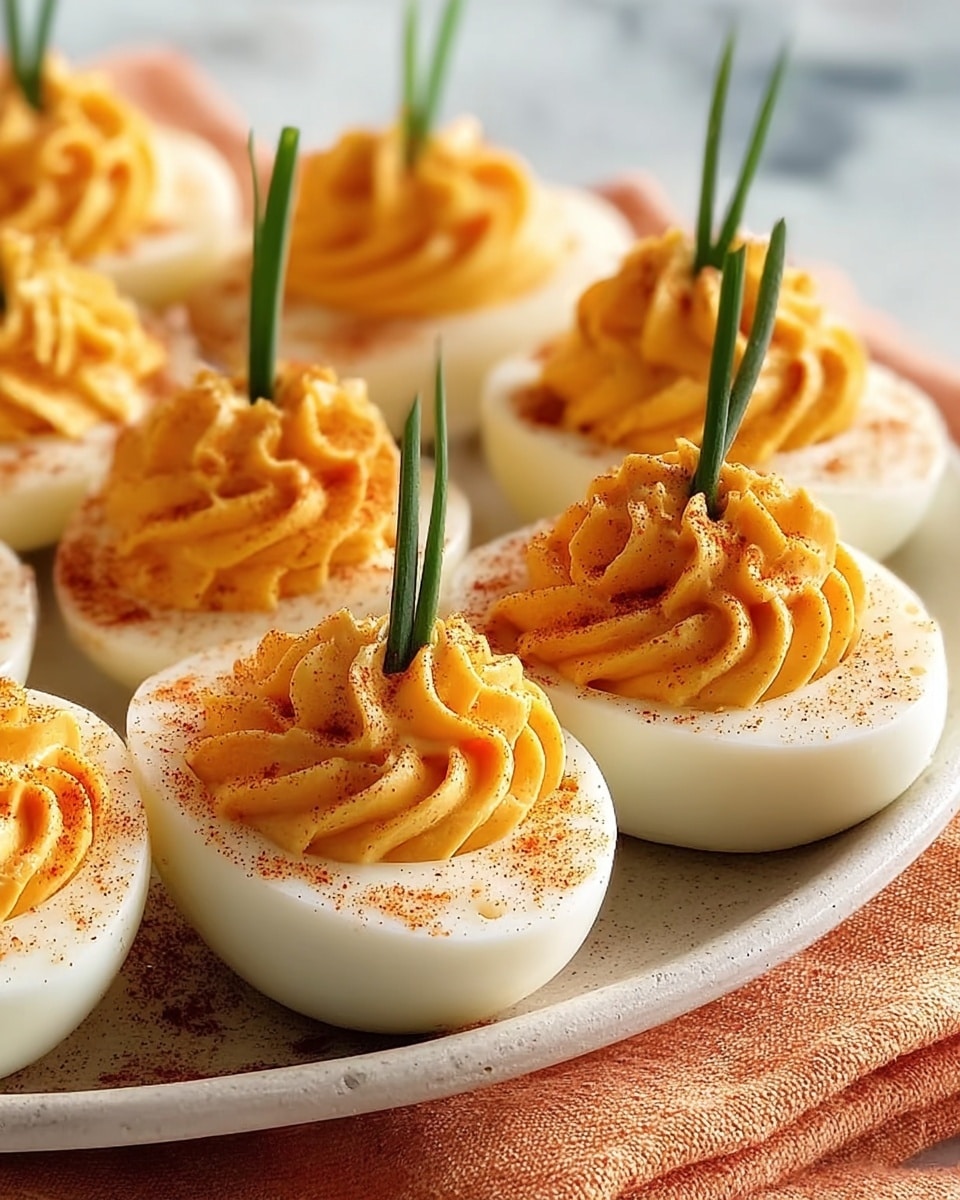
- Step 6: Spoon the yolk mixture into a piping bag fitted with a star tip. Pipe into each egg white half, swirling to create a plump pumpkin shape.
- Step 7: Use the dull side of a knife or a toothpick to make slight indentations from the top center down the sides of each piped yolk to mimic pumpkin ridges.
- Step 8: Insert small bundles of 2–3 chive pieces about 1/2 to 3/4 inch long upright into the top center of each pumpkin as stems.
- Step 9: Lightly dust with extra paprika and sprinkle remaining chopped chives around the platter for garnish.
- Step 10: Chill the deviled eggs in the refrigerator for at least 30 minutes before serving to allow flavors to meld.
Tips & Variations
- Use fresh chives for the best flavor and bright green color for the pumpkin stems.
- If you don’t have a piping bag, use a small spoon to carefully fill the egg whites and shape with a toothpick.
- Try smoked paprika instead of regular for a smoky depth of flavor.
- For a creamier filling, add a bit of sour cream or cream cheese along with the mayonnaise.
Storage
Store the deviled eggs covered in an airtight container in the refrigerator for up to 2 days. They are best served chilled. Avoid leaving them at room temperature for more than 2 hours. If needed, bring them out briefly before serving to soften the filling slightly but do not reheat.
How to Serve
Serve this delicious recipe with your favorite sides.
FAQs
Can I prepare these deviled eggs in advance?
Yes, you can prepare and assemble them up to 24 hours ahead. Keep them refrigerated in a covered container until serving.
How do I get the eggs to peel easily?
Using the boiling and resting method followed by an ice bath helps the egg whites contract and separate cleanly from the shell, making peeling much easier and preventing damage to the eggs.
PrintPumpkin Patch Deviled Eggs Recipe

Pumpkin Patch Deviled Eggs are a festive and fun twist on classic deviled eggs, perfect for fall gatherings and Halloween parties. These creamy, flavorful eggs are beautifully piped to resemble miniature pumpkins, complete with chive stems and a dusting of paprika for a vibrant autumn look. The foolproof method ensures easy peeling and perfectly smooth yolk filling, making them as delicious as they are charming.
- Prep Time: 15 minutes
- Cook Time: 10 minutes
- Total Time: 55 minutes
- Yield: 12 deviled egg halves 1x
- Category: Appetizer
- Method: Boiling
- Cuisine: American
- Diet: Vegetarian
Ingredients
Eggs
- 6 large eggs
Filling
- 1/4 cup mayonnaise
- 1 teaspoon yellow mustard
- 1/4 teaspoon salt
- 1/8 teaspoon black pepper
- 1/2 teaspoon paprika, plus more for dusting
- A tiny dash of orange food coloring (optional, for vibrant pumpkin color)
Garnish
- 2 tablespoons fresh chives, finely chopped (for stems and garnish)
Instructions
- Boil the Eggs: Place eggs in a single layer in a saucepan and cover with cold water by about an inch. Bring to a rolling boil over high heat. Once boiling, immediately remove from heat, cover with lid, and let sit for exactly 10 minutes to ensure easy peeling without overcooking.
- Ice Bath Cooling: Prepare an ice bath by filling a large bowl with ice and water. After 10 minutes, transfer eggs with a slotted spoon into the ice bath and let cool completely for at least 5 minutes. This helps the eggs contract and shell separate cleanly.
- Peel the Eggs: Tap each cooled egg on a hard surface to crack the shell, then roll between hands to loosen. Peel under cool running water for smooth, intact egg whites.
- Halve and Remove Yolks: Slice each peeled egg in half lengthwise. Carefully scoop out yolks into a bowl, keeping whites intact. Arrange egg whites on a serving platter.
- Prepare Filling: Add mayonnaise, mustard, salt, pepper, and 1/2 teaspoon paprika to the yolks. Optionally add a tiny dash of orange food coloring for vibrant color. Mash thoroughly with a fork until smooth and creamy. For extra smoothness, press through a fine-mesh sieve.
- Pipe the Filling: Spoon filling into a piping bag fitted with a star tip. Pipe into egg whites, swirling it to create plump, round pumpkin shapes.
- Create Pumpkin Ridges: Use the dull side of a knife or toothpick to gently make shallow indentations from top center down sides, mimicking pumpkin ridges.
- Add Chive Stems: Insert small bundles of 2-3 chive pieces (1/2 to 3/4 inch long) upright into the top center of each piped pumpkin shape as stems.
- Finish and Garnish: Lightly dust the eggs with extra paprika and sprinkle remaining chopped chives around the platter.
- Chill and Serve: Refrigerate for at least 30 minutes before serving to meld flavors and enhance presentation.
Notes
- For the easiest peeling, do not boil eggs too long; 10 minutes off heat is optimal.
- Orange food coloring is optional but adds a vibrant pumpkin hue to the filling.
- Using a piping bag with a star tip helps create a more realistic pumpkin texture.
- Make the chive stems fresh just before serving to keep them crisp and vibrant.
- Best served chilled; these deviled eggs can be made a few hours ahead of time and refrigerated.
Keywords: deviled eggs, pumpkin deviled eggs, Halloween appetizer, fall recipes, festive snacks, party appetizers