Vampire Fudge Recipe
“`html
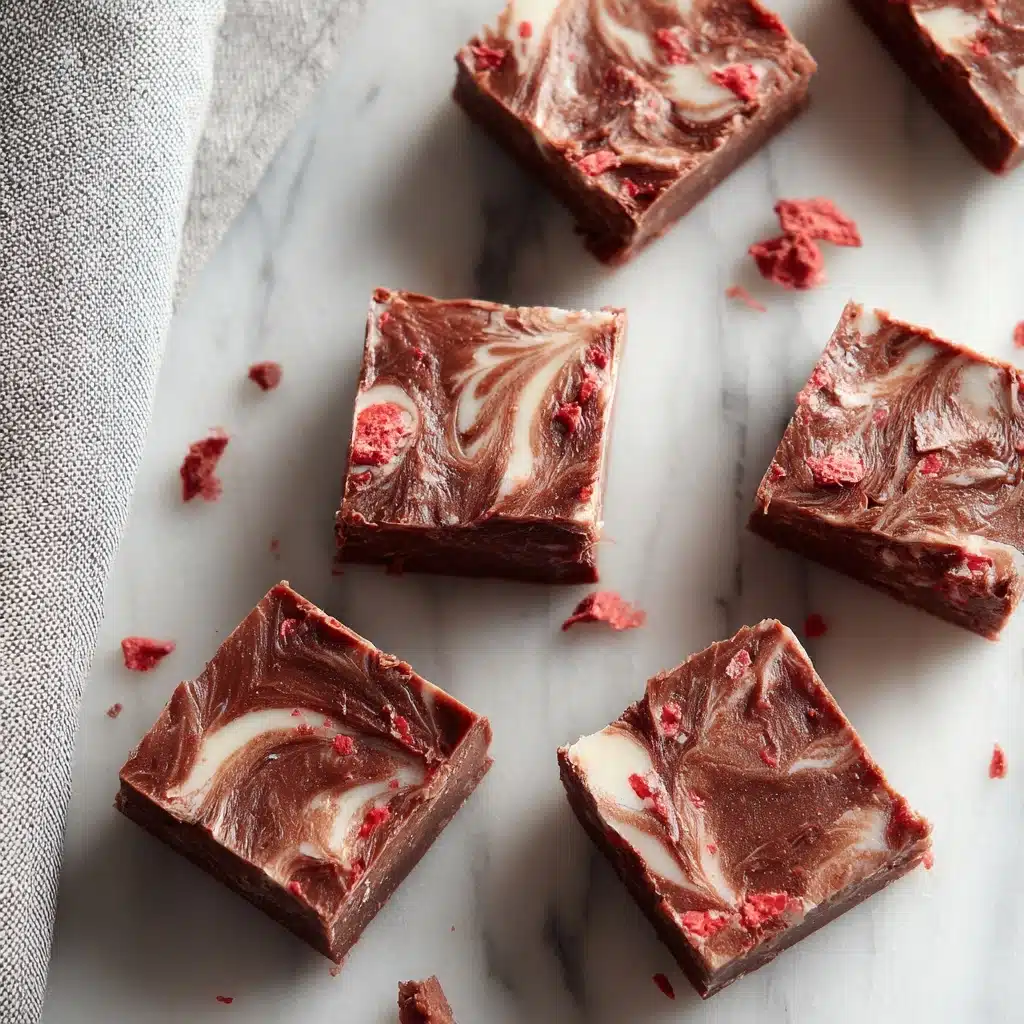
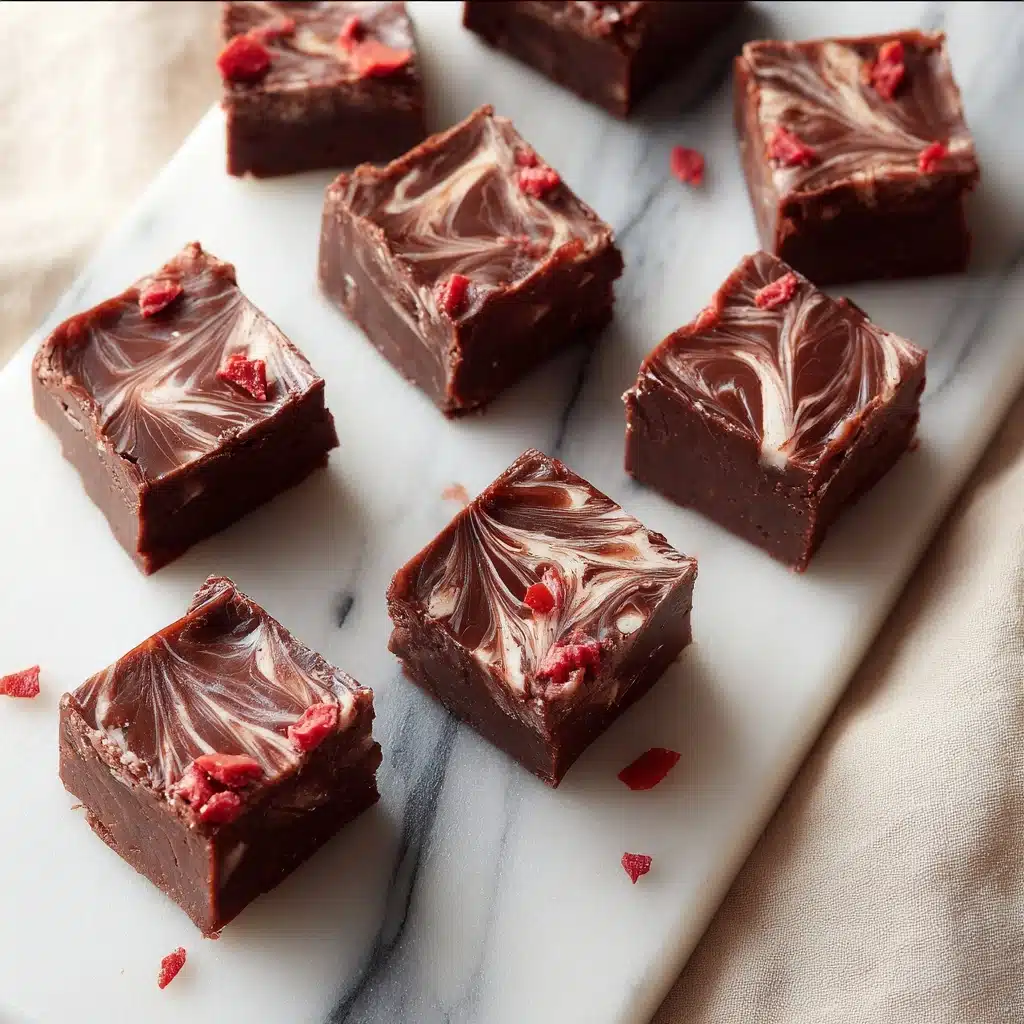
If you love rich, creamy, and slightly spooky treats that are sure to delight both your taste buds and your eyes, then this Vampire Fudge Recipe is exactly what you need. It’s a luscious chocolate fudge that combines the smoothness of sweetened condensed milk and butter with dramatic blood-red swirls of food coloring designed to look like a vampire’s favorite indulgence. Sweet vanilla and a touch of creative decoration transform this simple dessert into a memorable treat perfect for Halloween parties or anytime you want to add a little spooky fun to your sweets.
Ingredients You’ll Need
These ingredients are simple yet essential to achieve the perfect balance of rich chocolate flavor, velvety texture, and that eerie vampire aesthetic. Each element adds something vital, from the luscious melt of chocolate chips to the dramatic pop of red color that makes this fudge truly one of a kind.
- 2 cups semi-sweet chocolate chips: This forms the rich chocolate base and ensures a perfect melt and creamy texture.
- 1 cup sweetened condensed milk: Provides sweetness and creaminess that give the fudge its signature softness.
- 1/2 cup unsalted butter: Adds a smooth richness and helps bind the fudge together flawlessly.
- 1 teaspoon vanilla extract: Enhances the overall flavor with a gentle warmth and depth.
- Red food coloring: Creates the iconic blood-like swirls that make this fudge unmistakably vampire-themed.
- White chocolate chips: Used for piping cute vampire teeth to decorate the top of your fudge.
- Black sugar or black sprinkles (optional): Adds a gothic flair and textured finish to your presentation.
How to Make Vampire Fudge Recipe
Step 1: Prepare Your Pan
Line a 9×9 inch baking dish with parchment paper to guarantee easy removal once your fudge has set. This simple step saves lots of cleanup and keeps your fudge looking pristine.
Step 2: Melt the Chocolate Mixture
In a microwave-safe bowl or double boiler, gently melt together the semi-sweet chocolate chips, butter, and sweetened condensed milk. Stir constantly until the mixture becomes silky smooth. Taking your time here ensures your fudge mixture is creamy with no lumps.
Step 3: Add Flavor and Color
Stir in the vanilla extract to brighten the chocolate’s rich notes. Then, add a few drops of red food coloring and gently swirl it in using a toothpick or skewer. This will give you the marbled, blood-red effect that makes this fudge chillingly beautiful.
Step 4: Pour and Even Out
Carefully pour the chocolate mixture into your prepared baking dish. Spread it evenly with a spatula to create a smooth top, setting the stage for your vampire decorations.
Step 5: Chill Until Firm
Place the baking dish in the refrigerator for at least two hours. This cooldown time allows the fudge to firm up perfectly, making it easy to cut and display those signature vampire details.
Step 6: Decorate with Vampire Teeth
After your fudge has fully set, melt the white chocolate chips and pipe small vampire teeth shapes on the surface. These little details add charm and invoke that spooky yet adorable vampire spirit we love.
Step 7: Add the Finishing Touches
If you want to take the gothic look up a notch, sprinkle black sugar or black sprinkles over the fudge. It’s the perfect dark contrast that gives this treat a mysterious and decadent vibe.
How to Serve Vampire Fudge Recipe
Garnishes
Adding vampire teeth with white chocolate creates a delightful visual that’s both fun and thematic. Black sugar or sprinkles are excellent to scatter around – they add a subtle crunch and an edgy aesthetic that will captivate your guests.
Side Dishes
This fudge pairs beautifully with simple accompaniments like fresh berries, which add a juicy bite and brighten the palate. Hot drinks such as black coffee or a creamy chai latte are wonderful partners, balancing the fudge’s rich sweetness perfectly.
Creative Ways to Present
Try cutting the Vampire Fudge Recipe into small, bite-sized squares and placing them on a dark serving tray lined with cobweb-patterned parchment paper. For an extra thrill, serve alongside small bowls of gummy worms or blood-red fruit punch to complete the spooky party vibe.
Make Ahead and Storage
Storing Leftovers
Keep your fudge in an airtight container at room temperature for up to a week. This helps maintain its soft texture and preserves the vibrant colors and decorations.
Freezing
The Vampire Fudge Recipe freezes wonderfully. Wrap it tightly in plastic wrap and store in a freezer-safe container for up to three months. Thaw in the refrigerator overnight before serving to keep its luscious consistency intact.
Reheating
Since this is a no-bake fudge that’s meant to be enjoyed chilled, reheating is not necessary. Serve straight from the fridge or at room temperature for the best experience.
FAQs
Can I use milk chocolate instead of semi-sweet chocolate chips?
Absolutely! Milk chocolate will make the fudge sweeter and creamier, which some people prefer. Just keep in mind it will alter the richness and the slightly bitter balance that semi-sweet chips provide.
Is it okay to skip the red food coloring?
Technically yes, but the red food coloring is what gives the Vampire Fudge Recipe its spooky signature look. Without it, you’ll have delicious fudge, but it won’t have that dramatic “bloody” vampire effect that makes this recipe so special.
How do I pipe the vampire teeth if I don’t have a piping bag?
No piping bag? No problem! You can use a small zip-top bag, snip off a tiny corner, and use that as a makeshift piping tool. It’s quick, easy, and works just as well for creating those cute teeth shapes.
Can I make this fudge vegan or dairy-free?
Making this vegan would require substitutions like coconut condensed milk and vegan chocolate chips, but the texture and flavor might change. To keep the authentic Vampire Fudge Recipe experience, it’s best as written.
How long will this fudge stay fresh?
Stored properly in an airtight container, your Vampire Fudge Recipe should stay fresh for about a week at room temperature, or up to two weeks if refrigerated.
Final Thoughts
This Vampire Fudge Recipe is such a joy to make and share, bringing together rich chocolate goodness with playful, spooky charm that’s perfect for any festive occasion. Whether you’re serving it at a Halloween bash or just craving a treat with a bit of bite, you’re going to love how simple ingredients transform into such a show-stopping dessert. Go ahead and try it—you might find this delicious fudge becoming your new seasonal favorite!
“`
PrintVampire Fudge Recipe

Indulge in a spooky and delicious treat with this Vampire Fudge recipe. Rich semi-sweet chocolate is swirled with a blood-red touch of red food coloring and complemented by sweetened condensed milk and butter for smooth, creamy fudge. Decorated with white chocolate vampire teeth and optional black sugar sprinkles, this dessert is perfect for Halloween parties or gothic-themed gatherings.
- Prep Time: 15 minutes
- Cook Time: 10 minutes
- Total Time: 2 hours 25 minutes
- Yield: 16 servings 1x
- Category: Dessert
- Method: No-bake, Refrigeration
- Cuisine: American
- Diet: Vegetarian
Ingredients
Main Ingredients
- 2 cups semi-sweet chocolate chips
- 1 cup sweetened condensed milk
- 1/2 cup unsalted butter
- 1 teaspoon vanilla extract
- Red food coloring (to create a blood-like effect)
Decorations
- White chocolate chips (for vampire teeth decoration)
- Black sugar or black sprinkles (optional for gothic look)
Instructions
- Prepare the baking dish: Line a 9×9 inch baking dish with parchment paper to ensure easy removal of the fudge once set.
- Melt the base mixture: In a microwave-safe bowl or double boiler, combine the semi-sweet chocolate chips, unsalted butter, and sweetened condensed milk. Heat and stir frequently until the mixture is completely smooth and well blended.
- Add flavor and color: Stir in the teaspoon of vanilla extract. Then add a few drops of red food coloring to the mixture and gently swirl it to create a marbled, blood-red effect throughout the fudge base.
- Pour and spread: Pour the prepared mixture into the lined baking dish, using a spatula to spread it evenly across the surface for an even thickness.
- Chill the fudge: Place the baking dish in the refrigerator and chill for at least two hours or until the fudge is fully set and firm to the touch.
- Decorate with vampire teeth: Melt the white chocolate chips carefully and use them to pipe small vampire teeth shapes onto the surface of the set fudge for a striking and thematic decoration.
- Add gothic accents: Sprinkle black sugar or black sprinkles over the fudge if you desire an added gothic touch to complement the vampire theme, then allow decorations to set slightly before serving.
Notes
- Use parchment paper or foil for easy fudge removal from the baking dish.
- Adjust red food coloring quantities to achieve desired intensity of blood-red swirls.
- White chocolate vampire teeth can be piped using a small piping bag or a zip-top bag with the corner snipped off.
- Store finished fudge in an airtight container in the refrigerator for up to one week.
- For a sharper blood effect, use gel-based food coloring instead of liquid.
- Let white chocolate decorations set fully before slicing to avoid smudging.
Nutrition
- Serving Size: 1 piece (approx. 1.5 inch square)
- Calories: 180
- Sugar: 22g
- Sodium: 40mg
- Fat: 9g
- Saturated Fat: 5g
- Unsaturated Fat: 3g
- Trans Fat: 0g
- Carbohydrates: 26g
- Fiber: 2g
- Protein: 2g
- Cholesterol: 15mg
Keywords: Vampire fudge, Halloween dessert, chocolate fudge, gothic sweets, easy fudge recipe